
![]() Before I get into this workflow, if you have not tried PernixData’s FVP in your environment, it is a must. All you need is a couple SSD drives and download a free trial from their site and you can begin seeing the advantages quickly. It not only speeds up your VMs but gives your array a break! Now to the goods.
Before I get into this workflow, if you have not tried PernixData’s FVP in your environment, it is a must. All you need is a couple SSD drives and download a free trial from their site and you can begin seeing the advantages quickly. It not only speeds up your VMs but gives your array a break! Now to the goods.
PernixData is installed inside the vSphere host as a host extension. Unfortunately, the upgrade process is not as streamlined as the rest of their product’s experience. It requires us to upload the upgrade zip file to each host, put each host into maintenance mode, and run a few commands through the shell of each host. Definitely a repetitive and lengthy process if you have numerous hosts.
I took a look at the official documentation, available within the support portal on PernixData’s website, and determined I could quickly put together a vCenter Orchestrator, soon to be vRealize Orchestrator. Not only could I automate the upgrade process on a single host, but I could do it an a cluster level. I figured this is appropriate as PernixData should be deployed at a cluster level to take full advantage of the technology without limiting the agility of the VMs within the host. Below I will walk you through the process.
RTFM!
Make sure you have read the prerequisites before kicking off this upgrade process. No VM can be accelerated by FVP during the upgrade process so they need to be put into Write-Through mode. On the opposite end of this process, don’t put the VMs back into Write-Back mode until all hosts are upgraded and confirmed in working order.
Once you are ready to commit to the upgrade, my workflow requires you to upload the upgrade zip file to the “/opt/vcofiles/” directory on the vCO appliance. If this directory does not exist, please create it or modify the workflow to look elsewhere. If you are not using the vCO appliance, I recommend it over the Windows server install, especially if you are using the vCO service that is installed with the Windows installed version of vCenter. You could modify the script to look at a different location, like a Windows directory, if you choose to make it work that way. The workflow will pull the zip file from the specified directory and scp it to each host as it upgrades each host in serial. Now you are ready to run the workflow.
You will be prompted to select your vCO appliance and a cluster of hosts to upgrade.
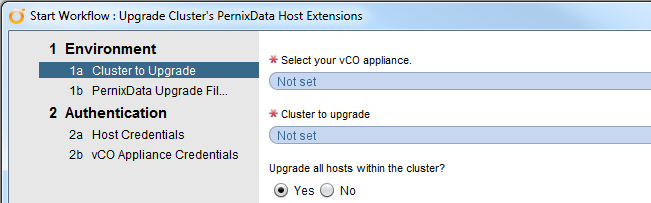
Then you have the option to upgrade all hosts in the cluster or a selection of hosts. You may want to select a single host to test out the process if you’d like or even in the event that a host has an issue with an upgrade, you can then select the remaining hosts in a future pass.

Next you will enter the filename of the upgrade zip. Be sure to include the .zip file extension.

On the next screen, enter the credentials for the host that you would enter if you would be upgrading FVP manually.
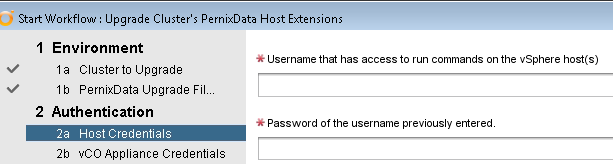
On the last page, enter the credentials of the vCO appliance. Then kick off the workflow.

Heavy Lifting
The workflow will gather all of the hosts you have approved for the upgrade and put them in an array. It will then select the first host, put it into maintenance mode, turn on SSH, upload the zip file to a temporary directory on the host, then send the following PernixData supplied command to uninstall the current host extension:
cp /opt/pernixdata/bin/prnxuninstall.sh /tmp/ && /tmp/prnxuninstall.sh
Once complete, it will then run the following install command:
esxcli software vib install -d /tmp/<upgrade filename>.zip
The workflow will clean up after itself and remove the upgrade zip file and prnxuninstall.sh file from the /tmp/ directory. The host will then be taken out of maintenance mode and SSH turned back off.
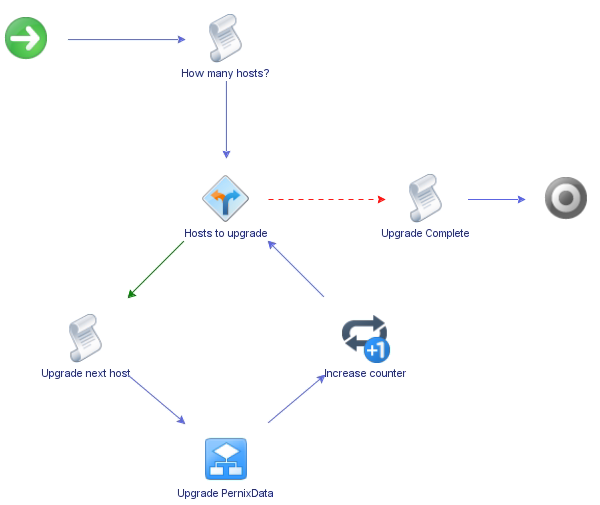
Full Schema
Below, I have included a picture of the full schemas from vCO. This shows the schema for the cycle of host upgrades.
The following schema shows where the real work goes on.
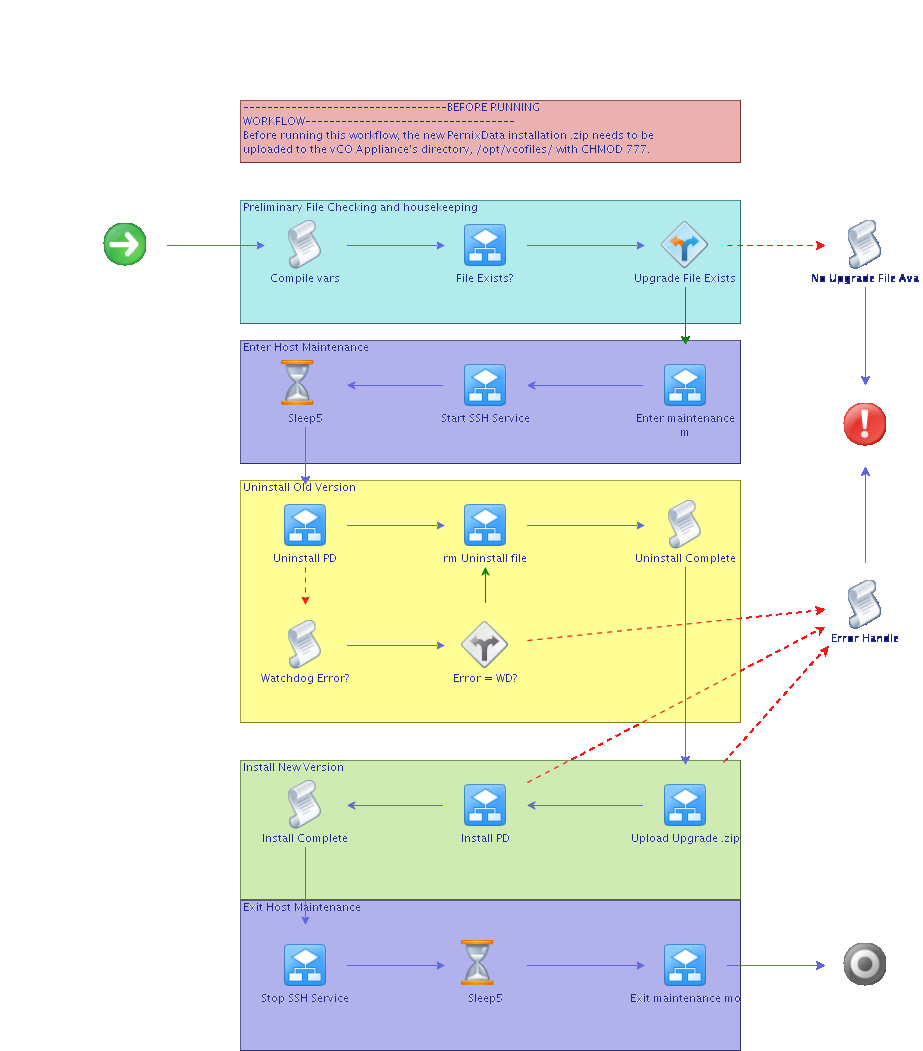
As you can see there is some error handling. I discovered a couple returns that vCO believed to be “erroneous” but after I checked and confirmed with PernixData support, they were false positives.
Even though this workflow has worked in my environment, it does NOT mean it will work in yours. Make sure you read PernixData’s official documentation and know the process as well as comb over the workflow itself to ensure it won’t cause issues within your environment. Use at your own risk and remember, I am not responsible if this workflow causes issues within your environment.
I have uploaded the orchestrator package to my Github page. If I make any changes to the workflow, both pages will be upgraded with the latest version. Automate all the things!!